
How do you decide which darning/mending technique to use?
Some questions to consider:
-is the patch going to be visible or will it blend in?
-what type of garment are you repairing?
-how much time do you want to spend mending?
When it comes to mending, there is never an exact yes or no answer. It is (almost) always the case that there are several different ways to approach any mending project. Today, I’ll share several darning techniques, the level of difficulty, and how long you can expect each darn to take. This is not an exhaustive list, just the techniques that I use in my mending, and are also commonly practiced styles of darning.
I won’t be covering the how-to today. However you can find tutorials on YouTube, and there are lots of mending teachers out there, including me! You can check out my upcoming workshops by clicking here.

1. Needle Weaving Darn
When I think of darning, this is the style that comes to mind. It is a patch that is woven on the surface of the fabric, covering the hole or stain.

When to use: To cover a hole, stain, or weak spots. This is a useful technique for socks, sweaters, and even wovens.
Beginner friendly: yes
If time is a factor: The time it takes to complete this mend depends mostly on the size of the darned patch. Whereas a small patch may take 5-10 minutes, a much larger hole could take an hour to mend.

2. Scotch Darn
This type of darn is made by knotting, rather than weaving. The finished patch is a thicker, textured look.

When to use: This is a good fit for patches at least 2”, in length and width.
Beginner friendly: yes
If time is a factor: This is a very fast type of darn. Larger holes may be covered in a short amount of time.

3. Swiss Darn/Duplicate Stitch
While not for beginners, this type of darn is a way of reworking the missing stitches.
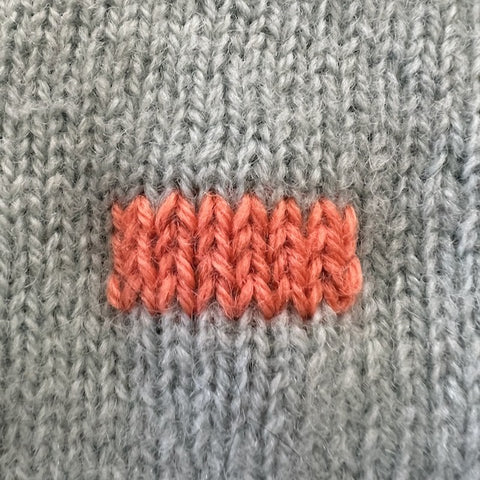
When to use: When repairing invisibly, or reinforcing thin, weak stitches in an area. It is also fun to use this stitch as visible mending, for a neat pop.
Beginner friendly: no
If time is a factor: This type of darning takes a LONG time and can be frustrating if you are a novice mender.

4. Embroidered Darning Stitches (Japanese, Blanket Stitch, Open Back Stitch)
Embroidery stitches use the fabric to stitch into as a way to reinforce weak or stained textiles.
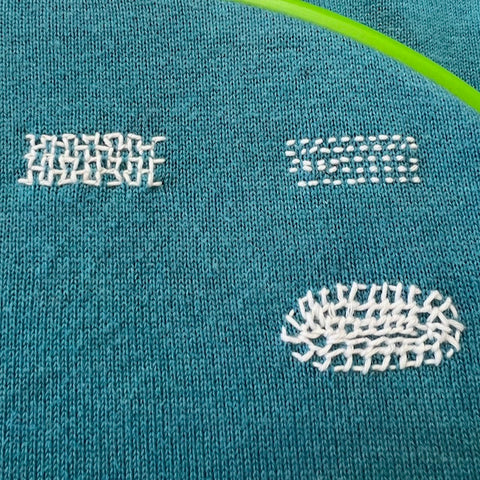
When to use: In thinning areas, build a layer of fabric to reinforce and strengthen.
Beginner friendly: yes
If time is a factor: Embroidery stitches are typically a quick way to mend. The smaller the stitches and larger the area, the more time it will take.
I hope this collection of darning techniques helps you to choose your next darning project with ease. . . or at least more ease.

Now that you have a bunch of darning options, what will you choose for your next darning project?