
How to Repair Denim with Simple Underside Patches
This type of mending will work for both small and large holes. It's a simple and fast way to patch jeans with denim patches and hand stitching.
Cut the fluff

By trimming off those fluffy frays, it's much easier to keep a clean mended edge, and to stop your stitches from getting tangled in the fray.
Position the patch on the inside of the jean leg

Cut a patch of denim that is 3/4" larger than the hole, and pin it in place.
Make small snips around the hole

Cut small snips every 1/4", about 1/4" deep, perpendicular to the edge of the hole.
Tuck the edges under
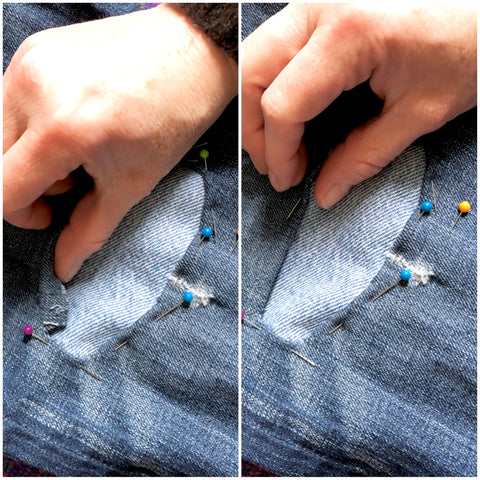
Go around the hole, tucking the flap you made with the snips under. Pin in place. This creates a smooth edge.
Now to stitch
Begin with your needle on the underside of the patch. Stitch through the patch and the 2 layers of the folded under edge. After pulling the needle all the way through, re-insert the needle through the patch, and at an angle, and bring the needle back up through the folded layers.

Continue stitching around, securing the fold as you stitch along.

And before you know it, all finished! Knot, or weave your thread end into the stitches.

Vary it up
Make your stitches a little more visible by stitching farther away from the edge.
Another variation that I like to use, is to stitch lines radiating away from the patched hole.

If you like the look of mended circles, here's another tutorial you might like:
Fabulous! Love your work!